Showing posts with label diy. Show all posts

Tuesday, August 19, 2014

Freshly Painted Cabinet Comes Out of Hiding


Last year I created a tween bedroom for my oldest son.


But there was one little "nook" I didn't show you.


It's a vanity area. But, my dirty little secret is that it spent the better part of a year looking like this...


This, my friends, is called a DIY fail. I tried to do a lime washed effect with chalk paint, and as you can see, it didn't work out too well for me.


I convinced myself that I would try again. Someday. In the meantime, my tween became a teen and I started working on other projects. It seemed this poor little vanity would forever remain in it's pathetic state.

School was about to start for the year, and my son asked me to please, at least, reattach the cabinet door.

I decided to forget my grand plans of some special paint effect, and just paint the darn thing already!


So that's what I did. I painted the cabinet with BM "Chelsea Gray."


It only took about an hour, and I love the color. Why didn't I do this sooner??

I used Benjamin Moore's Advance paint. No sanding, no priming, and the finish is great.


So glad I'm not hiding any dirty little secrets anymore… at least as far as you know :)


Thursday, July 10, 2014

Six Steps to Choosing the Perfect Exterior Paint Color


Man, it's hard to come back from vacation. I was getting used to this…


and this...


and this…


But, alas, I am back to reality.

And that means I need to stop messing around and pick an exterior paint color for our house.


I'm not gonna lie. Choosing a new exterior paint color is no simple task.

So, in hopes of helping others who may be facing this same difficult decision, I will share my process for finding the perfect exterior paint color.


Step 1: Log onto houzz.com and search for photos of home exteriors. There are approximately 8 million pictures to peruse. Okay, maybe only 626,076. Tomato tomato.


When you find a house color that you think might be perfect for you, scroll through the comment section to see if the designer/architect has provided the paint color info. Please note: if it truly is the perfect paint color, the name will not be noted. At this point, you can choose to hunt down the paint color information by every means necessary (Google, Pinterest, e-mailing the architect, etc), or you can move on. For the sake of sanity, I recommend you just move on.


Step 2: Go for a drive. Face it. After all the hours you've just spent online, you need to get out of the houzz, er, house.


via


Take note of any house colors that grab your attention (in a good way). Pull out your phone and snap some pictures. And, if you have no shame the guts, ring the bell and ask the homeowner for the name of her paint color. She will probably be flattered that you asked, and call the police back to tell them there's no need to come and apprehend a stalker.


Step 3: Get paint samples. When you have the names of some colors you'd like to try, go get some sample pots from the paint store. Yes, they'll set you back a few bucks initially, but they can also save you from making a very costly mistake down the road.

Plus, you can make cool pyramids with them.


Paint some swatches on your house. You might want to start with small swatches, because some of the colors you will inevitably hate right away. "What? This didn't look mint green in the picture!" Remember that paint looks different on a computer screen than it does in real life. It also looks different on a paint chip than it does covering the side of your house. It's a tricky little bugger!


Step 4: Paint large swatches on your house. When you've narrowed down your paint choices, start painting large swatches on different sides of your house. Check them at different times of day, so you can see how the colors look in various light conditions.


Stand back and stare at the paint and see how many neighbors stop by to weigh in on the decision. This could either be helpful, or confuse you more than ever. Good luck.


Step 5: Ignore your husband when he says, "Why don't we just keep the color we already have?"

Take a deep breath and recognize that he is trying to be helpful. The fact that he is not, is irrelevant.


Step 6: Make a decision. If you like the large paint swatches at various times of day; If it blends well with your landscaping, your roof, your brick/stone; If no one has stopped by and begged you to reconsider; then you are ready to make a decision.

When your house is painted, looks beautiful, and receives tons of compliments…. post a picture of it on Houzz.

And, please, include the name of the paint color.

Thursday, May 29, 2014

A Weathered Table


This table sits in our family room, and has endured many small hands gouging it with Legos, blocks, matchbox cars and other random objects for many years.

It was weathered when weathered wasn't cool.


Now that my boys are getting older, the threat of furniture destruction is at an all-time low. I could safely fix up this table without fear that my work would be destroyed within a day.

Since I'm currently having a love affair with "duck egg blue" paint, I contemplated using it for this project. But I didn't want to be a one-trick pony, so I decided to try something new.


I dragged it outside and sanded it down to the natural wood. There was one funky strip of red wood that you can see on the right hand side.


Using foam brushes, I applied a couple coats of Minwax Weathered Oak stain.


And this is how it turned out...


It has a unique look to it, which I'm kind of digging. There are some red and blue-ish undertones.


I should probably seal it with something, but for now I'm living with it the way it is.


Now it looks naturally weathered as opposed to "beat up."


School is out for summer in two hours! Yikes! I better go enjoy my last moments of freedom before the chaos really kicks in.

Have a great afternoon!!


Tuesday, May 27, 2014

Duck Egg Blue Furniture


Hey there! Hope you enjoyed your Memorial Day weekend.

We hosted a cookout/pool party on Sunday, so we were scrambling to get our backyard in shape. We did weeding and planting and cleaning and painting and outdoor furniture shopping. I told my husband that we should plan a party every weekend, so we are forced to get house projects done :) I'll share photos of the completed backyard soon.

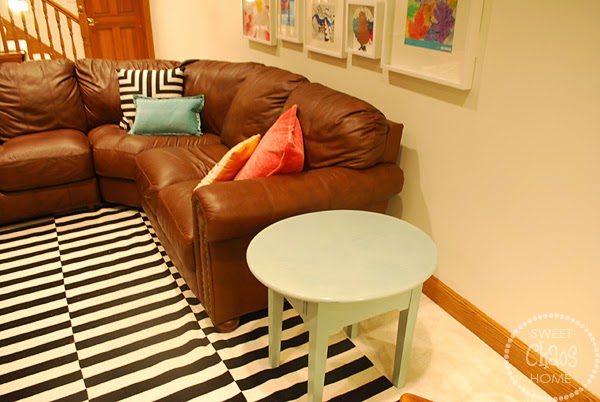
If you follow me on Instagram, you may have seen pics of some furniture I painted recently. I have been dying to use Annie Sloan chalk paint in "Duck Egg Blue" for like, forever. Then one day I was looking at this table in my basement.


And I thought, "Wow. That table is really dusty."


Then I thought, "Wow. That table is really nicked up. Maybe I should freshen him up and paint him duck egg blue."

I'm a deep thinker.

So, I broke out my nasty drop cloth and started painting.


It was love at first sight. I wanted to paint my entire house duck egg blue. Oh wait… most of it is :)


Here's my little table looking much happier in his new coat of paint.


Now, I was so in love with duck egg blue that I couldn't stop with just one little table. I looked around for another piece to paint, and spied my next victim.


This little old dresser from Pier 1 sits in our sunroom and holds the kids' art supplies. Using "old white" and "duck egg," I gave him a more beachy, cottage-y look.


There was no method to my madness. I just slapped paint here and there, until it had a weathered look.


I don't know why it took me so long to use this paint color. I love it so.


Since I didn't post yesterday, I would just like to extend my heartfelt gratitude to all the men and women who have sacrificed for our freedom. 


Friday, October 25, 2013

Updating an Old Picture Frame


The other day I came across my son's preschool picture from last year. I had intended to frame it, but since he's the 4th child, his picture ended up in a stack of papers stashed away in a closet. I know. He will need therapy someday. I haven't been in the running for mother-of-the-year for a long time.

Anyway, I decided to assuage my guilt and frame my poor baby immediately. I found an old picture frame (stashed away in another closet). The frame was dark and outdated, so I decided to give it a little facelift.

In my haste, I forgot to take a "before" picture, but you can get the idea from the "during" photos.


Dark wood, leaf pattern around the edges...


I painted the outer edge with ASCP "Old White" and the inner part with "Louis Blue."


I rubbed a little dark wax over the top.


And voila... my son's sweet face is out of the closet and on display!


I love using chalk paint for quickly updating outdated accessories. I need to go see what else is hiding in my closets.


What are you up to this weekend? I'm heading down to Nashville, TN with my 13 year old son. His band is playing a couple of gigs there. I'm hoping to squeeze in a little antique shopping in our free time. Planning to go to City Farmhouse in Franklin. If you know of any other places I should check out, please let me know!!


Wednesday, April 17, 2013

Something Old, Something New... and Something Blue

Sometimes the very thing you're looking for is right under your nose. Take this ladder, for example.


I've had it leaning against my family room wall, draped with quilts, for ages. But, it looked like this...


It was a little bit country (like Marie Osmond) and too dark for my newly-painted and lightened up family room. So, it was banished to the basement where all of my jewel-toned and dated furnishings have gone to live out their retirement.


Well, recently I've felt as if the wall in my family room needed something to jazz it up. It's a narrow wall between the window and an opening to the sunroom.  Hmmm... what would work in that spot? Duh! How about the ladder that used to be there. But this time I'd ditch the quilts and give the ladder a new look.

So I broke out a can of chalk paint in "louis blue," and painted it.


It's rather electric blue when it's first painted, but with some clear and dark wax, the color is toned down.


Voila! My wall is no longer empty, my ladder gets to come out of retirement, and the project didn't cost me a dime as I had all the materials on hand.


What treasures are hiding in your basement, attic or closet? The perfect piece may be living right under your nose. Or, at least, under your roof :)


Friday, March 22, 2013

Filling Holes in Ceramic Tile

Hey there! Didn't mean to be gone all week, but my little bathroom project turned out to be a bigger pain than I thought it would be. Go figure.

Anyway, when last I left you, I had just removed the ugly shower door from the kids' bathroom.


The shower door came off very easily. I simply lifted and removed the doors from the track. I then sliced the caulking with a razor blade, removed the top track, and unscrewed the frame. I scraped away the remaining caulk using Goo Gone and a razor blade. Pretty simple.

But, then I was left with 6 of these...


Holes in the tile.

I decided to fill the holes with marine and plastic putty.


This stuff worked great. I sliced off a bit of the tube, rolled it into little balls and stuffed it into each hole. I scraped off the excess with a putty knife.

In 24 hours, the putty was completely hard. It was ready to be sanded and painted.

And this, my friends, is where I hit a road block.

If my tile had been pure white, there would be no issue. You see, every porcelain repair kit or epoxy kit I could find came in "white." My tile is slightly off-white, and using white paint would just make the holes stand out even more.

This is why I haven't blogged for the past few days. I was using all my brain power to come up with a solution to my problem. Believe me, there isn't much left :)

Here's what I decided to do. I bought this...


Rust-oleum Appliance epoxy in "biscuit."

Now, I just wanted to touch up the small holes, so I sprayed some paint into a trim pan. Using a small paint brush, I dabbed the paint over the holes.


If you look closely, you'll see where I touched it up, but it blends in pretty darn well. And, from a distance, it really isn't noticeable.


Although from a distance, you can see how filthy the bathroom is :)

Things are going to get a whole lot worse in this room before they get better. My simple makeover is turning into a bit of a nightmare. But, that's a story for another day...

Have a fabulous weekend! And, if you have an ugly shower door, go rip it out!! You can do it :)