Showing posts with label room makeovers. Show all posts

Saturday, May 21, 2016

Bathroom Renovations


Hey there! Remember this design plan for my client's kids bathroom?


Well, the room is almost complete, and it's looking like this...


I need to take my good camera over and get some more pics, but in the meantime, I've started a bathroom renovation for another client. 

This is a "before" shot of the space ...


And here's my design plan for it...


We are going to use this pattern cement tile for the floor ...


I'm really excited about turning this vintage library table (a craigslist find!) into a vanity with a vessel sink and wall mount faucet.


I will be sharing progress pics next week, so be sure to follow me on Instagram for the latest.

Have a great weekend!

Sunday, February 21, 2016

Design Plan: Black and White Bathroom


Last Spring I designed this new master bathroom for one of my favorite clients.


My client loves her new bathroom, but she doesn't love that her little boys now use it all the time. And, since moms deserve at least one kid-free space in the house, we are going to update the boys' bathroom so they'll want to use it instead of the master bathroom.

The boys' bathroom is off the upstairs hallway, and is used by guests as well.


It needs an update, wouldn't you agree?  Here's the design plan...


We are basically tearing out everything and starting new. The new custom vanity will be finished in a dark gray stain, and the floor will be these gingham cement tiles that I am sooooo ridiculously excited to use.


We will add shiplap to the wall behind the vanity, two large round mirrors and sconces.

I'm hoping that the Delta Trinsic faucet will be available in the matte black finish by installation time, but if not, we will use the champagne bronze finish.

The tub will be replaced, and new subway tiles will be installed on the shower walls.

As soon as the vanity is ready, the demo will begin. Hopefully, in a couple of weeks! I will share the progress with you.

I think the bathroom is going to be gorgeous! Who knows, maybe mom will be using the boys' bathroom now :)

Thursday, February 4, 2016

Kitchen Makeover: The Layout


When I started planning our kitchen remodel, I had a few goals in mind. Naturally, I wanted to update the space to have it reflect our style. And, I had to replace some of the ancient appliances so that actual cooking could take place.

But, I also really wanted to improve the flow of the kitchen, increase the work space, and maximize storage.

The kitchen truly is the heart and hub of our home. There is a constant flow of kids coming and going through the side entry on the right and the stairs on the left. It's quite the circus, especially now that one of my kids has taken up juggling. He'd better not hit my chandelier!! ;)

Since we were keeping the original footprint of the kitchen, I had to give a lot of thought to how the space could function best for our family.


I took this next picture the day before demolition began. You can see there was wasted space above the cabinets. The only thing that was stored on those ledges was dust :)


The cabinetry between the kitchen entry and the door to the backyard always bothered me. It closed in the kitchen and blocked the light. And, it really didn't offer any efficient storage.


I decided I would rather replace the sliding glass door that we never used with a window, and put in more storage below.


I had to sacrifice my farmhouse table to accommodate the new cabinetry, but I LOVE our new round table. It's actually much more intimate, and makes for better traffic flow through the kitchen.


The new window opens out to the deck, and we had a small wooden bar built outside, so I could toss food out to the kids and they wouldn't have to come in and mess up my new kitchen. See... I put a lot of thought into this plan.


Inside, the new cabinetry gives me plenty of space to store the endless piles of paper that turn up out of nowhere and junk up the house.

And, it's a great spot for serving food and drinks when we host parties.


On the other side of the kitchen is our back stairway that used to house a small closet and desk underneath it...


This area was really a waste of space. The desk was ridiculously small to actually be able to sit and work, and the closet was too far from the cooking area to function as a pantry.


The space now functions as a beverage center with a refrigerator, sink and hidden coffee bar.


Our previous kitchen island housed an enormous cooktop and a prep sink, leaving very little space to do any prep work or serving.


We never used the sink. I stored papers in there. Don't judge.


I was so happy to get everything out of the island, and just have a clean expanse to serve food or have folks gather around. However, I will admit that it has been hard for me to break in the new marble. I'm getting better ... slowly...


The island is large and has loads of storage on one end. Having counterstools that slide underneath the other end helps keep obstacles out of the way so the savages can easily raid the fridge.


We kept our big ole' subzero refrigerator, because some things just aren't made like they used to be. We had some small repairs made to it in the past, and were told this beast still had a long life ahead of him. I hope so!!


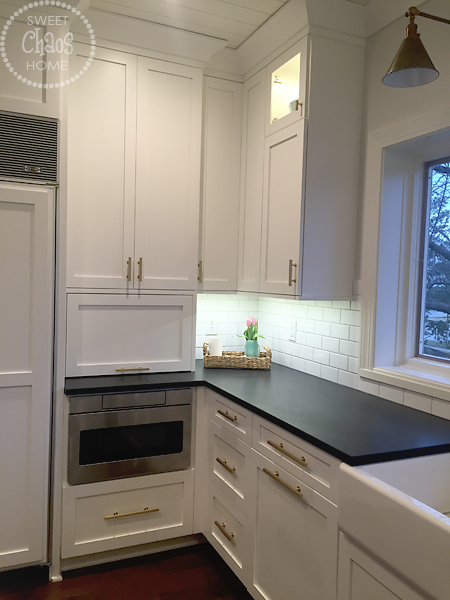
Next to the refrigerator, we installed in a microwave drawer. This is the kid's favorite thing ever. Everyone who comes to our house for the first time has to agree to a 45 second microwave demonstration.


Cooking has become much easier now that we have a properly working range and oven. I'm even enjoying cooking more now. A little bit. I'm trying to anyway.


So, hopefully that gives you a better idea of the kitchen layout, and why I made certain decisions.


Hey... did you notice the crockpot on the countertop? I'm writing a blog post and cooking dinner. Seems like I really have my act together today. Good thing you can't see the rest of my house :)

Have a great day!!


Wednesday, January 13, 2016

Kitchen Reveal... Finally!


Happy New Year!!

I can't believe it's January, and I'm just now revealing the kitchen that we started remodeling last summer. Hopefully, you were following along with me on Insta or Facebook, so you could see some of the progress.

I really enjoyed the entire process of this renovation. Although there were some stressful moments, I feel very lucky to have been able to create my dream kitchen. I will provide more details and the rationale behind certain decisions (like why I chose not to put pendants above the island) in future blog posts. But, for today, I thought I'd go with fewer words and more photos :)


This is how the kitchen looked the day before demo began...


And, here it is now...


Thanks for your patience and for indulging my picture overload :) Let me know if you have any questions. I will share more specifics soon!


Sharing at Wow Us Wednesdays


Sunday, October 25, 2015

Client Project: Exterior Makeover


One of my favorite new clients also happens to be a really good friend. We are going to have lots of fun updating several rooms in her house. But, we decided to start the home makeover by refreshing the exterior with new paint colors.


Located on a wooded lot near a lake, the house had wonderful Craftsman style details.


However, the exterior paint was all one color which did nothing to highlight the unique details.


I decided to incorporate two different paint colors on the body of the house. Benjamin Moore "Copley Gray" was used on the shingles, and BM "Coastal Fog" was used on the wood siding. BM "Ballet White" makes the trim pop.


Here's the "after"...


The color variation is subtle, yet allows the architectural details to shine.


My friend really loves the color persimmon, so the custom color on the front door made her very happy.

I will be sharing all the updates we make to this home. If you don't see much from me here, please follow me on Instagram or Facebook for progress photos.

Happy Fall!!

Thursday, October 22, 2015

Bathroom Reno with a Vintage Vibe


Lots of totally awesome things came from the '80s: MTV, John Hughes' films, Pac Man, Dirty Dancing, and leg warmers.

Then there are some things that should have stayed in the '80s never to be seen again. Like mullets. And Cabbage Patch dolls.

And bathrooms with gargantuan tubs, small showers and popcorn ceilings.


Case in point: my client's bathroom. It was eerily similar to my master bathroom pre-renovation. The tub was the size of a small swimming pool, surrounded by a huge deck.


Yet, the shower and toilet were in a small enclosed room with poor ventilation.


My clients' wish list included:


  • a smaller, soaking tub without jets that didn't take an hour to fill with water
  • a properly-vented shower that wouldn't mildew
  • new tile floors that looked like wood
  • removal of the "popcorn" ceiling
  • installation of better overhead lighting


To save money, we kept the existing cabinetry. We also stayed with a very similar layout, so as not to incur huge expenses moving plumbing.


We started by removing the wall that separated the toilet/shower area from the rest of the bathroom. And, that's when we encountered our first obstacle: a large pipe running right up from the middle of the floor to the ceiling.


The plan was to have a completely open shower, and create a water closet for the toilet. However, we now had to work around the pipe.


We decided to expand the shower, and "wrap" the pipe.


This is how it came together…


I didn't get a good shot of the shower, but it is so much more spacious. There is a corner bench and a built-in niche for shampoo and soap.


I've said it before, but I will never design a shower without a handheld sprayer on a slide bar. It makes cleaning soooo much easier!


My clients live in a lovely Colonial home in a beautiful neighborhood. They wanted this room to have a vintage vibe… just not an '80s vintage vibe :)


I absolutely love these faux wood tile floors. My photos do not do them justice! They are so realistic looking, complete with little nail heads in the corners. 


My clients are loving their new non-80s bathroom. The only problem is they can't keep their two sons from using it, too. So now we are going to go to work on updating the boys' bathroom. I'm really excited about that project, and will share details soon.


I have so much fun working with this client. She grew up in an old farmhouse, which influenced her design aesthetic. You can see the dining room I designed for her HERE.